It is possible to manage stock via the management page. This is a paid feature, please inquire about it.
Overview of Features
Step 1:
Go to the management page and navigate to the tab Products > Stock.
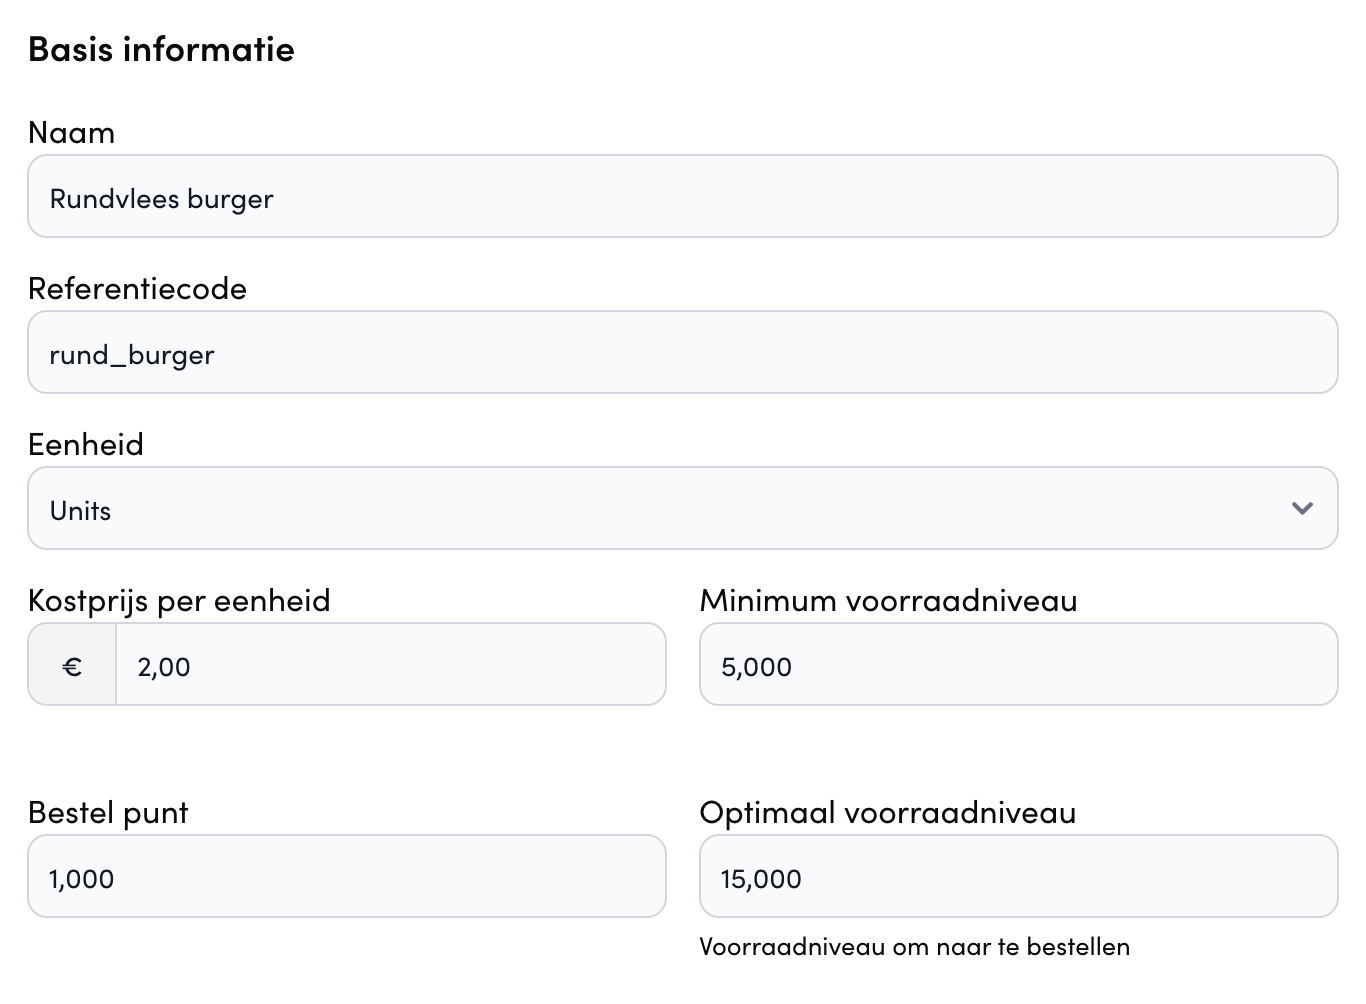
Click the green button + Add Stock Item and fill in the following details:
Go to the management page and navigate to the tab Products > Stock.
Click the green button + Add Stock Item and fill in the following details:
- Name
- Code (Reference code, for example barcode)
- Unit
In the stock settings, enter:
- Cost per unit
- Minimum stock level (Min. level)
- Reorder point
- Optimal stock level
Save the changes.
Step 2:
Set your current stock correctly by clicking Edit next to the relevant item in the 'Stock Management' overview. Click 'Adjust Stock' and fill in the fields:
Set your current stock correctly by clicking Edit next to the relevant item in the 'Stock Management' overview. Click 'Adjust Stock' and fill in the fields:
- Adjustment type: Purchase, waste or correction
- Adjustment
- Reason
- Notes
In the overview, you will see the current stock after adjustment.
Step 3:
Go to the main menu Products and select the specific product for which you want to manage the stock. Within that product, go to 'Stock Ingredients':
Go to the main menu Products and select the specific product for which you want to manage the stock. Within that product, go to 'Stock Ingredients':
- Create stock item from product
- Add ingredients
- Manage stock
Bulk editing of products:
Go to the Stock page and select the products you want to modify by using the checkboxes on the left.
Click the Bulk Edit button.
Enter the changed data (such as prices or stock levels) and apply the changes.
Go to the Stock page and select the products you want to modify by using the checkboxes on the left.
Click the Bulk Edit button.
Enter the changed data (such as prices or stock levels) and apply the changes.
Bulk creation of products:
Click the Bulk Create button at the top of the page.
Enter all the products you wish to add in the 'Stock items' field.
Once you confirm, the products will immediately appear in the Stock Management overview.
Click the Bulk Create button at the top of the page.
Enter all the products you wish to add in the 'Stock items' field.
Once you confirm, the products will immediately appear in the Stock Management overview.
Additional check:
In the overview, you can directly see which items require action by the Status (for example 'Low' or 'OK') and the To order column.
You can also use the filter 'Only low stock' to get a specific overview of products that are below their minimum level.
In the overview, you can directly see which items require action by the Status (for example 'Low' or 'OK') and the To order column.
You can also use the filter 'Only low stock' to get a specific overview of products that are below their minimum level.
The operation of stock in the cash register and the synchronization with the management page works as follows:
Stock Management in Practice and Cash Register Integration
In this step, you will learn how the stock status affects the saleability of products and how the synchronization with the cash register works.
Step 1:
Stock Status and Availability
The status of a product changes automatically based on your set stock levels:
Stock Status and Availability
The status of a product changes automatically based on your set stock levels:
- OK: The current stock is above the minimum level. The product is available for sale.
- Low: As soon as the stock falls below the minimum level, the status changes to 'Low'.
- Automatic deactivation: When an item falls below the minimum, the product is automatically set to 'not available' in the webshop/availability list
Step 2:
Display in the Cash Register The cash register responds immediately to the stock status:
Display in the Cash Register The cash register responds immediately to the stock status:
- Shading: Products that are 'out of stock' (below the minimum level) appear shaded in the cash register.
- Visual check: This allows staff to immediately see which products can no longer be sold.
Step 3:
Sales, Refunds and Synchronization Data exchange between the cash register and the management page occurs automatically:
Sales, Refunds and Synchronization Data exchange between the cash register and the management page occurs automatically:
- Synchronization: Changes (such as sales) are synchronised every 30 to 60 seconds between the cash register and the management page.
- Sales: When a sale is made, the number of units sold is automatically deducted from the current stock.
- Refunds: When you perform a 'refund' in the cash register, the units are automatically added back to the stock. This is visible in the overview as a 'post refund'.
Important points to note:
- Correct Unit settings: It is crucial that the units per product are set correctly. You can configure that 1 unit is deducted per sale (e.g., a bottle), but also multiple units (e.g., 5 units per sale).
- Ingredient logic: If a product consists of multiple ingredients (e.g., a burger with buns, meat and tomato), the rule applies: if one ingredient goes out of stock, the entire product is immediately out of stock.
- Manual correction: You can always manually correct the stock (e.g., +2 or -2 units) to immediately restock an item or remove it from sale.
Comments
0 comments
Please sign in to leave a comment.